Time to jump into the next room (did you see the Sunroom last week?) as we get closer and closer to being done with the first floor of our home. This powder bath is on the first floor, in the hallway to the mudroom and our primary bedroom, and gets a ton of use (like the kids brush their teeth in here in the morning and many a child races here right after school if you know what I mean). but a powder bath is where we can have more fun – and usually, without natural light, you kinda of want to do something in order to add some interest. I had the initial idea to offset the wall-hung sink and make it all symmetrical (And guess what? Once those decisions are made, they are MADE). Thank goodness I love how it turned out because when my cabinet dreams fell through we had to improvise.
Here’s where it is in case you want a visual:
The Initial Plan

From the beginning, I knew that I wanted the sink where it is with a custom wood cabinet underneath, with a simple panel curtain (take a shot, if you are playing the “where else can she put the boro fabric” drinking game – and bring a flask on reveal day). ARCIFORM rendered it up and we couldn’t quite get it there. But around that same time my “good design decision ability” was waning, along with the budget being super depleted. When we got this quoted initially it was $2,500 and we hadn’t even dialed in the special details. I was like, “Nope, let’s just wait and see if a better, more interesting solution arises, we aren’t in a rush”. We ended up waiting for about nine months – which isn’t that long, BTW, and the only reason we even tackled this now was because we found a solution worth trying.


The original blue paint color was not the right vibe for me (SW 9147 Favorite Jeans). It was just too bright and periwinkle from the second I saw it all up. It wasn’t until a few months later that I felt confident enough in my instinct to make the change to SW 9078 Cocoa Berry. And while it’s just paint, when it comes to painting wood paneling like this it has to be sprayed super evenly/perfectly so doing this still took two and half days (a couple of hours to tape off, prime + first coat, then second coat on day two). You see I had fallen in love HARD with our guest room color (SW 6030 Artistic Taupe) and realized that a deeper version of it could be so pretty. Plus near this room, we had multiple blues and greens so I wanted a contrast.


So I started playing with other wallpapers along with other tables/vanities. I found this desk that is so pretty but clearly not the right height or width OR depth. That’s a lot of retrofitting. Oh, and the paint color on the left is the most accurate, BTW.
The Blanket Box


At Aurora Mills, I thought I found my piece – it almost fit in every single way, but once I got it in there it wasn’t a “hell yes”. And it was going to take so much work to retrofit it into a vanity (we’d have to raise it somehow, cut it open – do all this permanent stuff). And I figured to do all this permanent stuff it needed to be a “hell yes” (it was also really expensive, around $1k which admittedly is a bit overpriced for this, so I’m VERY glad I found a place for it on the front porch).
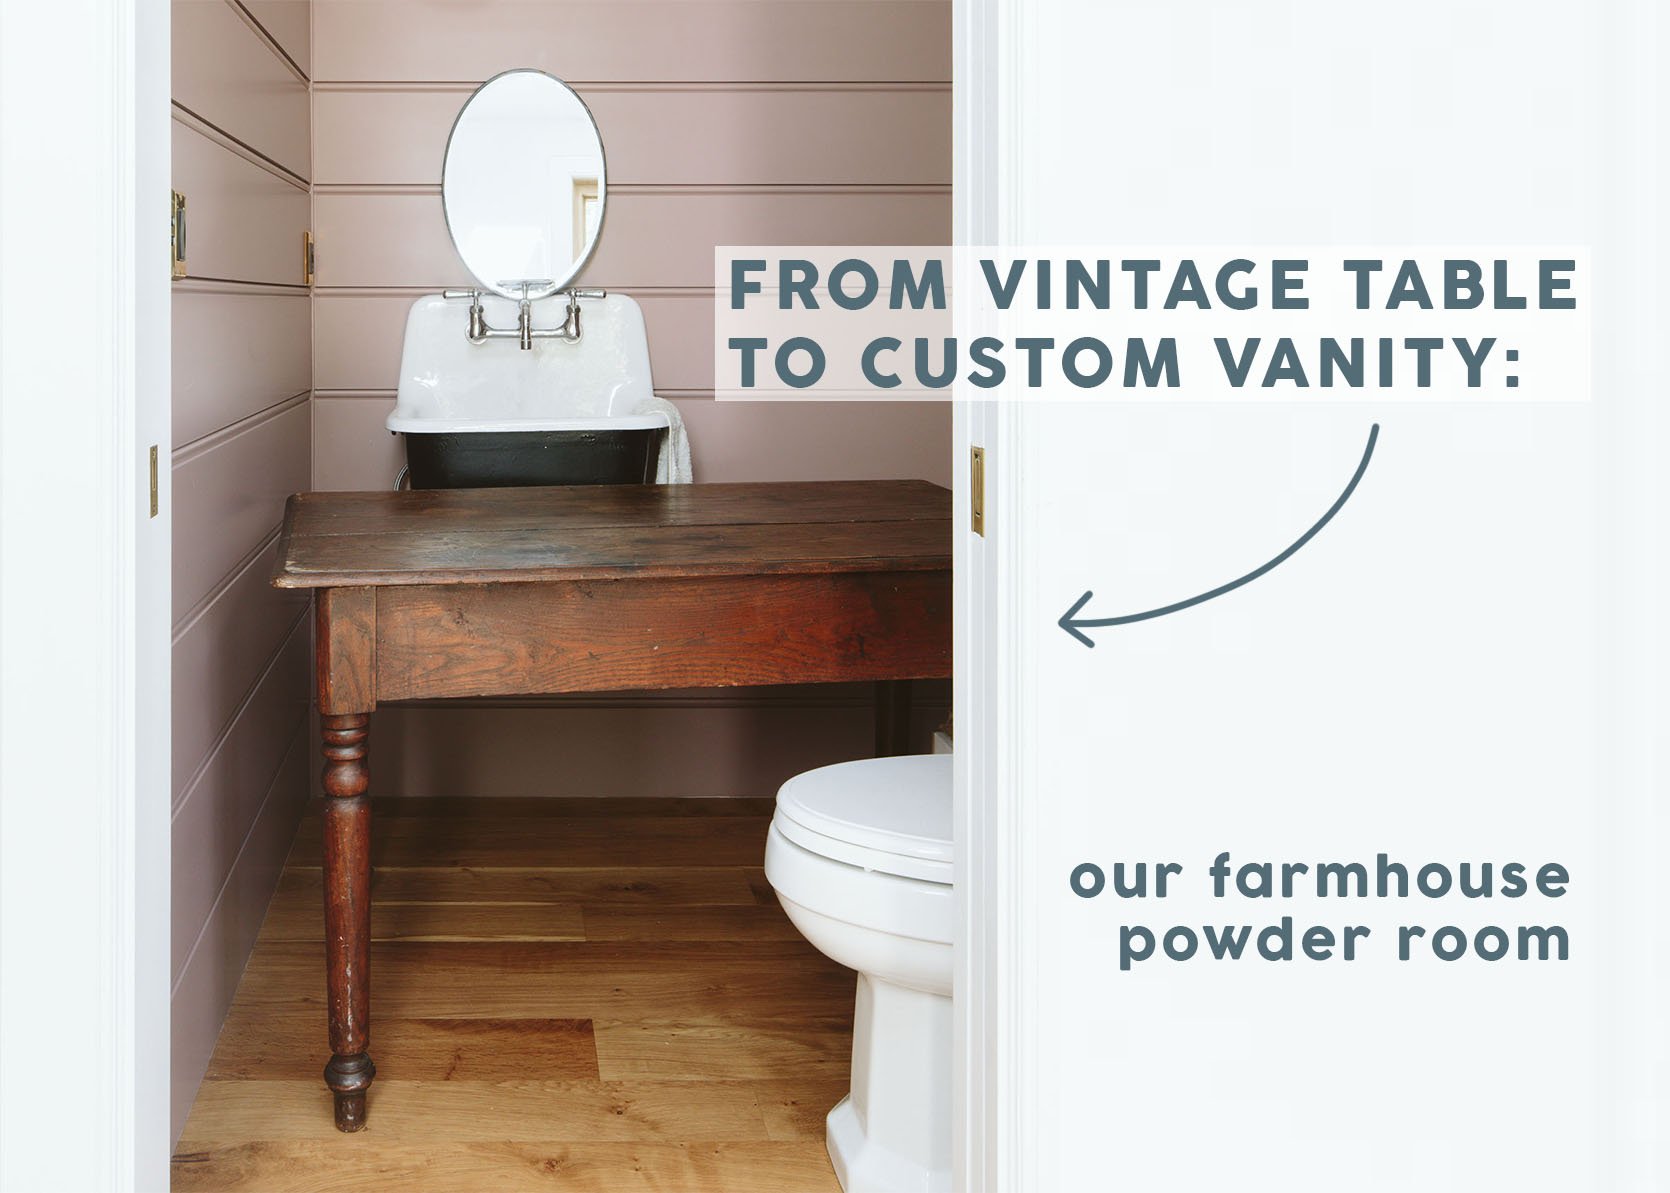
The Winner – A Vintage Table turned Vanity

Then one day, our client from the Crate & Barrel kitchen remodel, Julie, gave me this extra table. She asked me if I liked it and I of course did – it was such a great classic farmhouse table. We awkwardly shoved it in there and immediately loved the vibe. The warmth of the wood complemented the paint color and just added so much soul.


Of course, we had to make it work, which required again a lot of permanent cuts. So Dave, our handyman, came over and troubleshooted it with us. The plan was to cut off the back legs to make the depth right, then cut a perfect hole for the sink.


Then we took the bottom of the back-turned legs and cut them off to add to the height of the front two legs. I came back from Arrowhead this summer and it was DONE!!!

Paint Color | Sconce | Sink | Faucet | Switchplates | Hook | Table (vintage)
It turned out so great! We ended up pretty much centering it on the wall, which worked well because the wood on the front of the sink was around the same size as the excess wood on the right (so it looked really intentional).

The table is really rustic and old, with a billion imperfections and patina so we haven’t worried yet about caulking it, but that sink really catches almost all the water so I’m not worried about it.


BTW we actually ordered this sink with a chrome P-trap (the pipe underneath the sink) and we still have it but have yet to do it (mostly because calling a plumber to do this is not on my priority list, especially now that it’s covered).

So there’s where we landed – a free vintage farmhouse table, with the most perfect undertones for our vanity. Come back tomorrow to see some wallpaper options (with the reveal next week). She is turning out pretty darn cute …. (And a huge thanks to Julie for this table!! and to Dave for making it happen at MUCH less than the $2500). Julie and Dave FTW!
*Pretty photos by Kaitlin Green